

Last Updated on May 28, 2026

A shower door sweep is one of those small components that most homeowners never think about until it fails — and when it does, the consequences are immediately apparent. A damaged or worn sweep allows water to escape the shower enclosure at the bottom of the door, creating puddles on the bathroom floor, accelerating water damage to flooring and subfloor, and turning every shower into a minor cleanup project. Replacing a shower door sweep is a DIY-accessible repair that most homeowners can complete in under an hour with basic tools, and it costs a fraction of what a plumber would charge for the same job.

This guide walks you through the complete process of identifying the right replacement sweep, removing the old one, and installing the new one correctly so it seals effectively and lasts for years.

Understanding Shower Door Sweeps

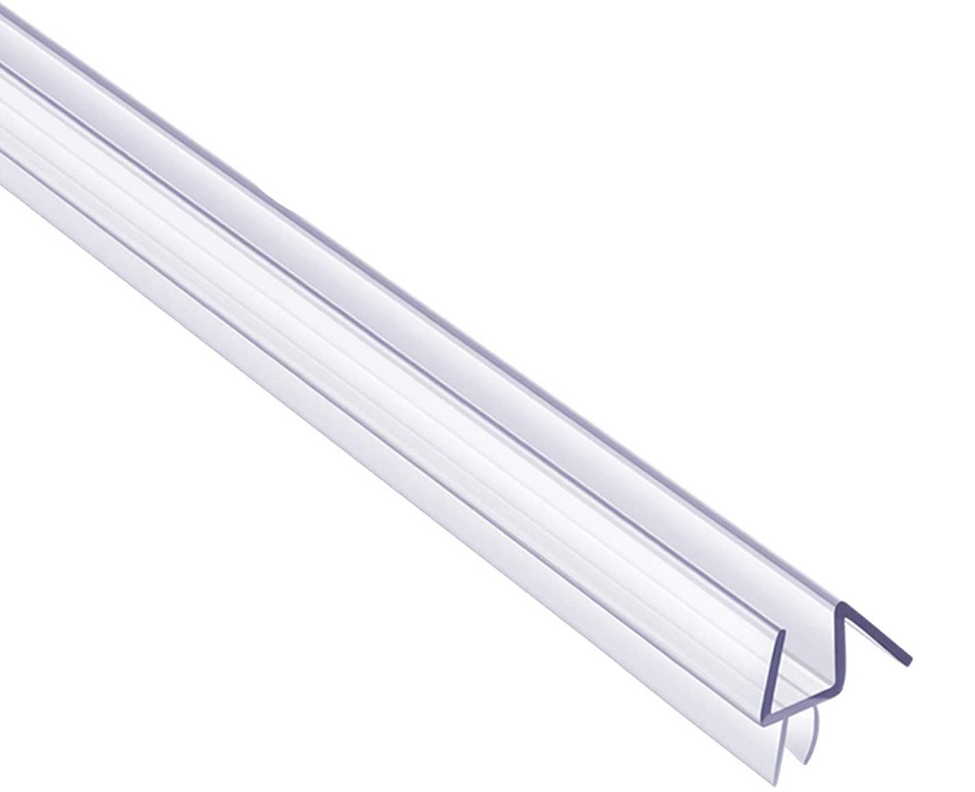
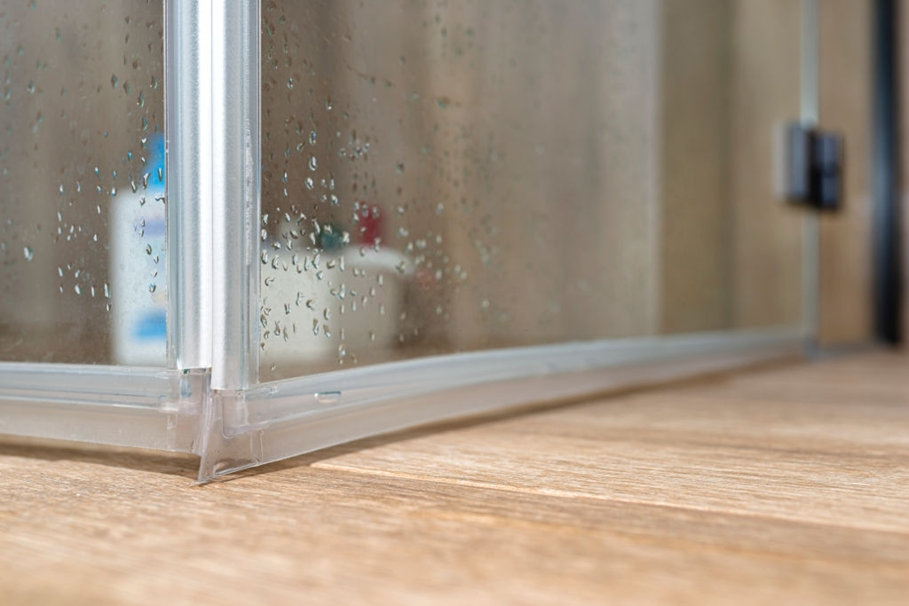
Before diving into the replacement process, it helps to understand the different types of shower door sweeps and how they function. A shower door sweep is a flexible strip of rubber, vinyl, or silicone that attaches to the bottom edge of a shower door and creates a seal against the shower pan or threshold when the door is closed. This seal prevents water from flowing out under the door during use.

There are several distinct sweep styles and mounting methods, and choosing the correct replacement depends on identifying which type your door uses:

Bottom seals or wipes attach to the bottom edge of the door and press flat against the shower pan. They typically slide into a channel on the door’s bottom edge or clamp around the bottom rail. These are the most common type on frameless and semi-frameless glass shower doors.

Drip rails or drip caps are rigid or semi-rigid strips that attach to the bottom of the door and direct water back into the shower pan when the door is open or being opened. They often incorporate a flexible wiper element and a rigid mounting rail.

Side jamb seals address water leakage at the vertical side of the door where it meets the wall or a fixed glass panel. These are not technically sweeps but are often replaced at the same time as the bottom sweep if they are deteriorating.

Frame seals are specific to framed shower doors and attach to the frame rather than the glass itself. These may require a different approach than the techniques described here, which focus primarily on frameless and semi-frameless door systems.

Assessing the Damage and Identifying the Right Replacement

The most important step in this repair is accurately identifying the sweep type and dimensions before purchasing a replacement. Bringing home the wrong size or the wrong style means starting over, and shower door hardware can require some research to match correctly.

Begin by thoroughly cleaning and drying the bottom of your shower door and the existing sweep. Examine the sweep carefully. Has the rubber dried out and cracked? Is it physically damaged or torn? Is it simply compressing no longer due to age? Note how it attaches to the door — does it slide into a channel, clamp around the frame, or attach with adhesive?

RELATED  Different Types of Toilets and How to Choose the Best for Your Bathroom

Measure carefully. The length of the replacement sweep must match the width of your shower door precisely. Measure the door width at the bottom, noting whether the sweep spans the full width or only the glass portion inside the frame. Also measure the thickness of the glass if the sweep slides over or around the edge of the glass, as glass thickness varies (typically between 3/8 inch and 1/2 inch) and this affects which sweep is compatible.

Photograph the existing sweep from multiple angles before removing it. These photos will be invaluable when shopping for a replacement and when installing the new one. Note the brand of the shower enclosure if you can identify it (often marked on the hardware or on a label inside a frame element) — this can help you find an exact manufacturer replacement that is guaranteed to fit.

Take your measurements and photos to a hardware store or shower door specialty supplier, or use them to search online retailers. Search specifically for “shower door sweep” combined with your glass thickness and door width. Most quality sweeps are available in multiple lengths and can be cut to size, which gives you some flexibility if you cannot find an exact width match.

Tools and Materials You Will Need

This repair requires minimal tools. Gather before you begin:

Replacement shower door sweep (correct type and dimensions), utility knife or heavy scissors, tape measure, clean lint-free cloths, isopropyl alcohol or adhesive remover (if the old sweep used adhesive), optional razor blade scraper for adhesive removal, and silicone lubricant spray (for sweeps that slide into a channel).

Removing the Old Sweep

The removal method depends on how the existing sweep is attached. Open the shower door and position it where you can comfortably access the bottom edge.

For sweeps that slide into a channel, the removal is usually as simple as pulling the sweep out of the channel — start at one end and work your way to the other, pulling firmly but steadily. The channel may have been sealed at one or both ends with a small end cap or set screw. Check for these before pulling; remove them if present. Some sweeps have a tendency to bind in the channel due to years of compression and exposure to soap and hard water buildup. If the sweep resists pulling out, spray a little silicone lubricant into the channel opening to help it slide.

For sweeps that clamp around the door rail, look for small Phillips head screws along the length of the sweep that secure it. Remove these screws and set them aside (they may be reused or may come with the replacement). Once the screws are removed, the sweep should pull away from the door.

RELATED  How to Wash Bathroom Rugs - Cleaning Bath Mats the Right Way

For adhesive-mounted sweeps, which are common on frameless glass doors, the sweep is typically pressed against the bottom edge of the glass with an adhesive backing. Carefully peel the old sweep away from the glass — if it has been in place for years, the adhesive may resist and require patience. Work slowly and use a razor blade scraper or plastic putty knife to assist if needed, being careful not to scratch the glass surface.

After removing the old sweep, thoroughly clean the surface it occupied. For channels, use a dry cloth and then a slightly damp one to remove soap scum, mildew, and mineral deposits. For glass surfaces where an adhesive sweep was mounted, clean with isopropyl alcohol to remove all adhesive residue; the new sweep will not adhere properly to a dirty or contaminated surface.

Installing the New Sweep

With the door clean and the replacement sweep in hand, installation proceeds in the reverse order of removal.

If the new sweep needs to be trimmed to length, measure carefully and cut with a sharp utility knife or heavy scissors. Measure twice — the sweep should be precisely the length of the door, neither shorter (which leaves a gap) nor longer (which prevents the door from closing properly). Most sweeps cut cleanly with a utility knife and a steady straight edge as a guide.

For channel-mounted sweeps, lubricate the channel lightly with silicone spray. Insert one end of the sweep into the channel opening and slide it in, working the sweep steadily into the channel from one end to the other. The sweep should fit snugly in the channel but should not require extreme force to install. If it binds severely, check whether the sweep profile matches the channel dimensions — a slight mismatch is often the cause. Once the sweep is fully seated, install any end caps or set screws that secure it in position.

For clamp-style sweeps that require screws, position the sweep against the door rail, aligning the screw holes. Start each screw by hand before tightening any of them, ensuring the sweep is properly positioned along the full length of the door before locking it down. Tighten the screws evenly so the sweep compresses uniformly along its length.

For adhesive-mounted sweeps on frameless glass doors, remove the adhesive backing and position the sweep carefully before pressing it to the glass. Most adhesive sweeps have a very limited window for repositioning once contact is made, so take time to position it precisely before pressing. Press firmly along the entire length for full adhesive contact. Allow the adhesive to cure fully — typically 24 hours — before the first use.

Testing the Seal and Making Adjustments

Once the new sweep is installed, close the shower door and inspect the seal from outside the shower. The sweep should make even contact along its full length with the shower pan or threshold. If you see gaps, the sweep may need adjustment or a different height configuration.

RELATED  Frameless Allure: The Contemporary Charm of Glass Shower Enclosures

The definitive test is functional: shower normally and check the bathroom floor outside the door during and after. There should be no water escaping under the door. If water still escapes at a specific location, identify whether the gap is in the sweep itself or at the wall-jamb seal, which may need separate attention.

For sweeps that are slightly too high and not making full contact with the shower pan, some designs include an adjustment mechanism that allows the sweep height to be raised or lowered slightly. Consult the replacement sweep’s instructions for adjustment options.

Maintaining Your New Sweep for Long Life

A shower door sweep typically lasts three to seven years depending on material quality, water quality, and maintenance. A few simple habits extend its lifespan significantly.

After each shower, allow the door to air-dry in the open position when possible. This prevents the continuous compression and moisture exposure that accelerates rubber degradation. Rinse the sweep periodically to prevent soap scum and mineral deposits from building up on its surface — these deposits cause the rubber to dry out and crack prematurely.

If you have hard water, periodic treatment with a commercial mineral deposit remover keeps buildup from accumulating on the sweep and in the channel. Hard water deposits can prevent the sweep from sealing properly even when the rubber itself is in good condition.

Inspect the sweep twice a year for signs of wear: cracking, stiffness, permanent compression, or gaps in the seal. Catching deterioration early and replacing the sweep before it fails completely prevents the water damage and cleanup issues that a fully failed sweep causes. The Pemko shower door bottom seal is a well-reviewed replacement option compatible with many common door configurations and available in multiple lengths.

When to Consider Professional Help

The repair described in this guide is within the capability of any homeowner comfortable with basic DIY tasks. However, a few situations suggest that professional consultation might be warranted.

If water escaping under the door persists after installing a new sweep, the problem may not be the sweep at all — it may be a drain that is inadequately pitched, a shower pan with improper slope, or a door that is not properly plumb and level. These are structural issues that require different solutions.

If the shower door hardware is extensively corroded, the frame is damaged, or the glass is cracked or stressed, replacement of the entire door assembly may be more appropriate than replacing only the sweep. A shower door supplier can assess the door’s overall condition and advise whether repair or replacement is the better investment.

For high-end shower enclosures from specialty manufacturers, contacting the manufacturer directly for a replacement sweep that is designed for your specific door model is often the best approach. Using a generic replacement in a precision-engineered enclosure can result in a less-than-perfect seal or installation difficulties that a manufacturer-spec replacement would avoid.

Brooks Manley

Brooks Manley

Brooks is a marketer by trade, but has developed quite the passion for home design since becoming a homeowner in New Orleans. He'll be writing about he and his wife's favorite home decor products as well as simple tips and tricks for creating a home you love.

Leave a Reply