Last Updated on August 25, 2023
Transform your kitchen in a flash with stylish counter décor! Carefully choose pieces that both look good and serve a purpose. Balance style with practicality – like decorative trays for salt & pepper, or cooking utensils. Keep it clutter-free using baskets or jars with essential items. And don’t forget personal touches – like family photos or vintage cookbooks. Create an inviting atmosphere that reflects your style and personality!
Clearing and Cleaning the Counters
To clear and clean your kitchen counters for a stylish kitchen, properly store and organize items and wipe down surfaces. These sub-sections will offer a solution to maintain clutter-free counters and ensure cleanliness for an aesthetically pleasing and functional kitchen space.
Properly storing and organizing items
- Designate storage areas for items by category. This creates order and makes it easier to find things.
- Utilize storage solutions like bins, shelves, and drawers to maximize space.
- Label containers and shelves to show what each area is for.
- Prioritize items based on frequency of use: commonly used items in accessible areas, less used in less accessible areas.
- Declutter and purge unnecessary items every so often.
- Stick to your system to avoid reverting to disorganization.
For extra organization, use clear storage containers so you can see what’s inside without opening them. This way you have a neat appearance and don’t need to search for misplaced items. Everything has its place, making it simpler to keep clean. Get organized and efficient with these tips!
Wiping down surfaces
- Gather what you need:
- Microfiber cloth or disposable wipe.
- A multi-purpose cleaner for the surface.
- A spray bottle with water.
- Prep the surface:
- Get rid of any loose particles using a dry cloth. Or, just brush them off. This will stop scratches or smudges when cleaning.
- Apply the cleaner:
- Spray on the surface or directly on the cloth (read instructions). Don’t oversaturate as it may cause streaks or harm to some materials.
- Wipe down:
- Scrub the area in circles. Focus on hard-to-remove stains. Do it from top to bottom, ensuring all areas are covered. Especially for high-touch spots like kitchen counters and bathroom sinks – be sure to clean properly.
- For added freshness, use disinfectant wipes after you’ve wiped the surfaces. Especially in heavily-used places like door knobs and light switches.
- Make it a habit to clean regularly. This will help keep your home clean and healthy.
I was wiping my kitchen counters one day and I saw how easily the dirt was being cleared away. It made me realise how important these simple yet effective techniques are for keeping our homes sparkling clean! So get your cleaning supplies and start wiping away dirt from all the surfaces!
Choosing a Theme or Design
To create a stylish kitchen with well-decorated countertops, you need to carefully consider the theme or design. This involves evaluating the overall style of your kitchen and incorporating your personal preferences and interests. By doing so, you can achieve a cohesive and visually appealing look that reflects your individuality and enhances the overall ambiance of your kitchen.
Considering the overall style of the kitchen
When selecting a style, personal preferences, space, and budget matter. For example, those who like a clean environment may pick modern style with sleek surfaces. Whereas, people who enjoy vintage may go for traditional or farmhouse style.
To achieve the perfect look, consider these tips:
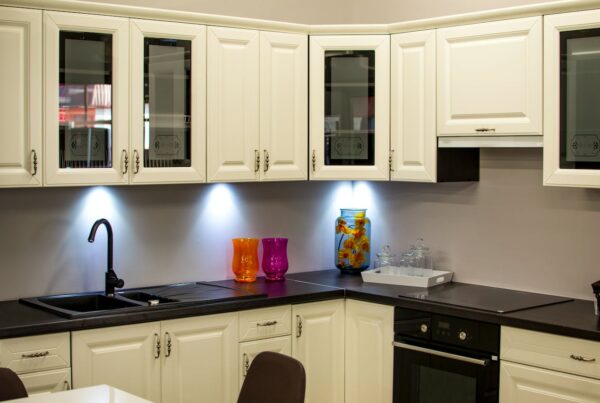
- Enhance the ambiance with lighting fixtures that match the style.
- Choose furniture pieces that align with the theme.
- Elevate the visual appeal with artwork and plants.
- Pay attention to details like hardware or backsplash.
By considering these tips and customizing them based on personal preferences and budget, you can create a kitchen that reflects your desired style!
Incorporating personal preferences and interests
Let’s discover how to include personal likes and hobbies in a theme or design.
Colors: Pick hues that match your taste.
Patterns: Use designs that signify your interests.
Artwork: Show pictures or art that motivate you.
These concepts are merely a few of the ways to bring in personal preferences. By selecting colors, patterns, art, and other elements based on your personal tastes, you can have a room that says it all.
Remember – this isn’t just about being fashionable. It’s about making a space that stands for who you are. Whether it’s with your much-loved colors or displaying art that has special meaning, these pieces will make your space uniquely yours.
Take action! Don’t pass up the chance to add your own look. Enjoy the freedom of self-expression and let your real character show in every corner of your home or workspace. Start examining different themes and designs now, and soon you’ll have a place that looks stunning and speaks to you.
Adding Decorative Elements
To add style to your kitchen counters, incorporate decorative elements such as displaying stylish and functional kitchen tools, incorporating greenery and natural elements, and using decorative containers or trays. These solutions will enhance the aesthetic appeal and create a visually pleasing and stylish atmosphere in your kitchen.
Displaying stylish and functional kitchen tools
Kitchen tools can be both functional and decorative. Show them off on shelves or racks. The mix of form and function makes for an attractive display. For instance, contrast stainless steel knives with wooden cutting boards and ceramic mixing bowls. This adds depth and promotes organization. Repurpose vintage glass jars into spice containers and find creative ways to show off copper pots and pans. This adds character and ensures essential tools are close by.
Pro Tip: Use magnetic strips or hooks to display regularly used items like ladles, spatulas, and whisks. This frees up drawer space and looks great on kitchen walls.
Incorporating greenery and natural elements
Up your space with greenery! Place potted plants around the room to bring color and life. Think succulents, peace lilies – minimal care required. Hang planters to utilize wall space. Vertical gardens for limited floor space – use wall-mounted planters or trellises. Add natural textures – wooden furniture, wicker baskets, jute rugs. Let natural light in! Keep windows clear of curtains and blinds. Terrariums, moss walls – bring freshness and conversation starters. Did you know? A NASA study found that plants can improve air quality – beauty and well-being in one!
Using decorative containers or trays
Decorative containers or trays add a unique touch. Display various items to create an organized and visually pleasing arrangement. Choose containers or trays that coordinate with the color scheme. Consider different materials for desired styling. Think of size in relation to what you’ll display. Layer elements for added depth and dimension. Switch up with the seasons for a fresh look. Use them on coffee tables, mantels, shelves, or even as table centerpieces. But, don’t let them overpower the décor. Simplicity is key!
Creating a Focal Point
To create a focal point in your stylish kitchen, decorate your kitchen counters with a solution that includes displaying a statement piece or artwork, and creating a visually appealing arrangement.
Displaying a statement piece or artwork
Light it up! Strategically illuminate your statement piece so that its unique details and textures stand out. Place it in a prominent spot to make it the centerpiece of the room. Change up the height – hang paintings eye level, place sculptures on pedestals or shelves at various heights. Create a complementary backdrop with colors and materials that accentuate its aesthetics. Mix traditional and contemporary elements for an exciting juxtaposition. Consider unconventional displays like vintage crates, ladders, or floating shelves. To keep things fresh, rotate displays periodically. Seek professional advice for informed decisions. Now you can showcase your statement pieces or artwork in a captivating way!
Creating a visually appealing arrangement
When designing an arrangement, consider its purpose. This will guide your decisions. Think about colors and contrast. Use them to make the arrangement stand out. Have varied textures. They give it depth. Balance sizes and proportions for harmony. Pick a focal point, whether it be one item or a group. Layer items for dimension. Lighting is essential for highlighting the arrangement’s best features. To make it more captivating, use unexpected elements or nature elements like branches or flowers. Experiment until you get a pleasing result.
Lighting Considerations
To ensure proper lighting considerations for a stylish kitchen, make sure to incorporate the right lighting solution for various tasks and create a captivating ambiance. Achieve this by ensuring proper task lighting and adding accent lighting for ambiance.
Ensuring proper task lighting
Task lighting is a must for a productive and comfy atmosphere. When setting up your lighting, consider these points:
- Position: Put the light in a way that eliminates shadows on the workspace. This gives your eyes a break and improves visibility.
- Brightness: Pick a bulb or lamp with the right intensity. Too dull and you’ll squint; too bright and it could cause glare.
- Color temperature: The color of light can influence your mood and productivity. For tasks that need focus, go for cooler temps (5000K-6500K). Warmer tones (2700K-3000K) are better for chill areas.
Also, adjust the lighting to individual needs while following workplace rules. Give your tasks enough light and take care of yourself.
Don’t forget, great lighting means better concentration and less eyestrain. Take action now and check your setup for optimal task lighting. Your eyes will thank you!
Adding accent lighting for ambiance
Accent lighting can draw attention to special areas or objects to create a unique focal point. Play with different light levels to set different moods – dimmed for coziness, or brighter for vibrancy! Decorative fixtures provide both light and visual interest.
To make the most out of your accent lighting: layer multiple light sources, opt for warm-colored bulbs, and incorporate dimmers for adjustable brightness. Create a captivating and inviting atmosphere, tailored to your style and preferences.
Final Touches and Maintenance
To give your kitchen a stylish look, ensure impeccable final touches and proper maintenance. Regularly cleaning and organizing the counters, as well as updating and refreshing the decor periodically, are the key solutions for achieving an aesthetically pleasing and well-maintained kitchen.
Regularly cleaning and organizing the counters
The importance of regularly cleaning and organizing counters cannot be understated. Not only does it help to eliminate germs and bacteria, but it also promotes productivity and a positive atmosphere. It even helps to prolong the lifespan of countertops by preventing dust, dirt, and spills from degrading them.
One story that illustrates this is about Sara, a restaurant owner. She noticed her counters were becoming sticky due to food spills, so she implemented a strict cleaning schedule for her staff.
This improved the overall cleanliness of her restaurant and efficiency in food preparation. As a result, Sara received rave reviews for the cleanliness and organization of her establishment.
It’s clear that even small tasks can have big impacts, making regular cleaning and organizing of counters a must.
Updating and refreshing the decor periodically
Revamp your space for a unique look! Incorporate new color schemes for personalization. Introduce statement pieces to make it a conversation starter. Rethink furniture arrangements for optimal functionality. Keep up with design trends for a contemporary feel. Explore natural light and textiles to add warmth and freshness. Small changes can make a big difference when it comes to refreshing your decor!
Conclusion
For stylish kitchens, decorating your countertops is key. Follow the design principles and add creative elements to turn this space into a visual masterpiece.
Start by selecting the right materials and colors. Choose countertops that are both durable and pretty, like quartz or marble.
To make your counter look amazing, organize items in trays or baskets. Add decorative elements like potted plants and stylish jars full of utensils.
Save counter space by hanging shelves or wall-mounted organizers above it. This will make your kitchen look interesting.
Lighting is essential too. Install under-cabinet lights or pendant lights to add drama to your counter.
My friend recently renovated her kitchen. She chose sleek black countertops with gold accents and arranged her cookbooks, cutting boards, and spices. The result? A stunning culinary haven that became the heart of her home.