
Last Updated on May 28, 2026
Building your own home is one of the most ambitious and deeply rewarding undertakings available to a homeowner. Unlike buying an existing house — where you work within the compromises and choices of previous owners — building from scratch means that every decision, from the orientation of the structure on the lot to the placement of every electrical outlet, reflects your specific vision for how you want to live. The result, when the process is navigated thoughtfully, is a home that fits your life with a precision that no existing home can match.
The process of building a home is also one of the most complex multi-year projects most people will ever undertake. It involves coordinating dozens of professionals, navigating regulatory requirements, making hundreds of consequential decisions under time pressure, and managing a budget that’s vulnerable to a wide range of unforeseen costs. Understanding the journey before you begin — the stages, the decisions, the pitfalls, and the pleasures — puts you in a vastly better position to navigate it successfully.
Step 1: Establishing Your Vision and Budget
Every successful custom home project begins not with architecture but with clarity: a clear-eyed understanding of what you want the home to accomplish and a realistic sense of what the project will cost. These two pieces of information are interdependent — your vision needs to fit your budget, and your budget needs to match the realistic cost of your vision. Establishing both with honesty at the outset prevents the painful misalignment that derails many home-building projects mid-process.
Building a home is significantly more expensive than purchasing a comparable home in most markets, for the straightforward reason that new custom construction requires paying for every component at retail rather than benefiting from the economies of scale that production builders achieve and that the used market provides. A realistic understanding of current construction costs in your market — typically expressed as a cost per square foot that varies widely by region, level of finish, and complexity — gives you a working number to evaluate whether your vision and budget align.
The vision process should address both practical and aspirational elements. Practical elements include bedroom and bathroom count, minimum overall size, required features (home office, garage configuration, mudroom, specific kitchen features), and any accessibility requirements for current or anticipated needs. Aspirational elements include the architectural character — the style, the relationship between spaces, the quality of light, the connection to outdoor spaces — that will make the home feel like yours. Collecting photographs of homes and spaces you love, noting what specifically appeals about each, builds a visual brief that communicates your aesthetic more precisely than words alone can.
Step 2: Finding and Preparing Your Land
For those who don’t already own land, finding the right site is the first major task of the home-building journey. The site selection is arguably the most permanent decision in the process — the structure can be modified over time in ways that the land and its location cannot. Consider the site on multiple dimensions: access to desired amenities and services, neighborhood character and trajectory, school district quality if relevant, utility availability (water and sewer connections or well and septic feasibility, electricity, gas), and the physical characteristics of the land itself.
Physical site assessment is essential before making a land purchase commitment. A survey determines the exact legal boundaries and identifies any easements or encroachments. A soil test determines whether the soil will support a foundation type appropriate for your intended structure and whether a septic system (if needed) can be sited on the property. A wetland determination identifies any areas of the property that are subject to federal or state wetland regulations that restrict development. Environmental due diligence — checking for prior uses that might have created contamination — is important for any non-agricultural property.
Site preparation typically begins after the land is purchased and design is sufficiently advanced to know where on the property the structure will be sited. Clearing, grading, and establishing utility connections are the primary site preparation tasks. These are early costs that need to be included in the overall budget rather than treated as separate from the building cost.
Step 3: Assembling Your Design Team
Custom home design is typically a collaboration between an architect (or residential designer), a structural engineer, and potentially specialists in landscape architecture, interior design, and specific systems. Understanding these roles and how they relate helps you assemble the right team and manage the design process effectively.
The architect’s primary contribution is the design of the home — the spatial relationships, the architectural character, the response to the site’s specific conditions and opportunities — and the production of the construction documents that contractors will build from. A good architect brings design intelligence that makes the home more functional, more beautiful, and more site-specific than generic plans can achieve. They also provide oversight during construction that catches issues early and ensures the built result matches the design intent.
A structural engineer is required for any custom home, translating the architectural design into structural specifications — the sizing of beams, columns, foundations, and floor systems that make the design buildable and code-compliant. The architect and structural engineer work together on these specifications, with the structural engineer providing the technical analysis that underlies the structural decisions.
For most homeowners, working with an architect directly — rather than purchasing pre-designed stock plans — provides advantages in site-specific adaptation, design customization, and construction oversight that justify the additional cost for a truly custom home. Architects typically charge a percentage of the construction cost (typically 8-15 percent for full services) or an hourly or fixed fee for more limited engagement. The investment in architectural services is returned in a more thoughtfully designed home and in the protection of having a professional representing your interests throughout the construction process.
Step 4: Design Development and Permitting
The design process moves through several phases from initial concept to construction-ready documents. Schematic design establishes the overall concept — the site plan, the floor plan configuration, the exterior massing and character. Design development refines the schematic design into greater detail — specific room sizes, door and window placement, basic systems coordination. Construction documents translate the design into the technical drawings and specifications that contractors bid from and that building departments review for permit issuance.
Permitting is a mandatory step before construction can legally begin. The building department review process varies in duration and complexity by jurisdiction — from a few weeks to several months in more heavily regulated markets. During review, the department’s plan reviewers assess the project for compliance with local zoning regulations, building codes, and any specific requirements applicable to the site (flood zone regulations, fire district requirements, design review standards in areas with design guidelines).
Required permits typically include a building permit (the primary permit covering structural, architectural, and basic systems work) plus separate permits for electrical, plumbing, and mechanical systems. Some jurisdictions require additional permits for site grading, tree removal, or demolition. Understanding the permitting requirements in your specific jurisdiction before the design process begins allows the schedule to account for permit timelines accurately.
Step 5: Contractor Selection and Construction Contract
Selecting the right general contractor is among the most consequential decisions in the home-building process. The general contractor manages the entire construction operation: scheduling subcontractors, coordinating materials delivery, managing the construction site, maintaining safety, and ensuring the work proceeds in accordance with the plans and specifications.
The bidding process for a custom home typically involves sending the complete construction documents to three or more qualified general contractors and requesting detailed bids. Evaluating bids requires looking beyond the total price to the assumptions and exclusions in each bid — what’s included in one contractor’s base price may be an allowance or exclusion in another’s. A detailed bid comparison that aligns line items across multiple bids reveals these differences and allows genuine apples-to-apples cost comparison.
The construction contract is the legal foundation of the project and should be comprehensive. Standard residential construction contracts from the American Institute of Architects (AIA) provide a solid, commonly used framework that protects both owner and contractor fairly. The contract should address scope of work, contract sum, payment schedule, change order process, warranty provisions, dispute resolution, and completion timeline. Having a construction attorney review the contract before execution is worthwhile for any project of significant size.
Step 6: Construction Phase
Construction of a custom single-family home typically takes 10-18 months from foundation to completion for a home of average complexity, with highly complex or large homes taking longer. The construction phase moves through recognizable stages: foundation and structure, rough framing, rough mechanical and electrical, insulation and air sealing, exterior cladding and roofing, interior finish work, and final systems installation, inspection, and punch list completion.
Your involvement during construction should be engaged but appropriate. Regular site visits — weekly is typical for most custom home owners — keep you informed of progress and allow you to raise questions while there’s still opportunity to address issues before they’re covered by subsequent work. Communicate concerns or observations through your architect if you have one, or directly to the contractor if managing the project yourself, and document all communications in writing.
Decisions and selections that weren’t finalized during the design phase will come up during construction. Cabinet hardware, light fixture specifications, plumbing fixture choices, paint colors, tile selections — these are the finish details that require decision-making during the construction phase. Having a designated process for reviewing options, making decisions, and communicating choices to the contractor reduces the confusion and delay that deferred or poorly communicated decisions cause.
Step 7: Inspections and Completion
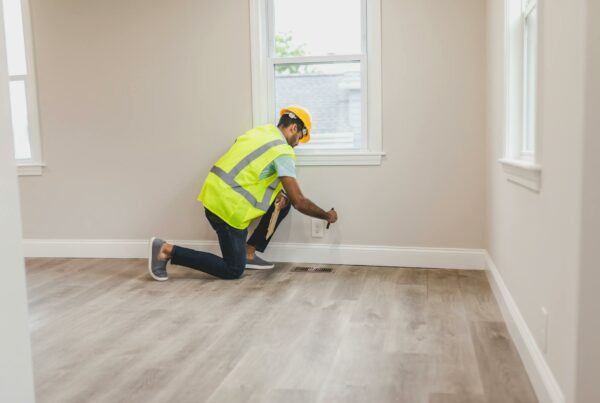
Building inspections — conducted by local building department inspectors at specified stages of construction — verify that the work meets code requirements. The inspections typically occur at key phases: foundation, rough framing, rough electrical and plumbing, insulation, and final. Failing an inspection creates delay and additional cost; ensuring that the work is genuinely ready for each inspection before scheduling it is part of competent project management.
The punch list is the final list of items requiring correction or completion before the homeowner accepts the work. Generating a complete punch list before final payment is made gives the contractor a clear list of remaining obligations and preserves the homeowner’s leverage to ensure those items are addressed. A thorough punch list walkthrough with the contractor, documenting items with photographs and specific descriptions, protects both parties by establishing shared understanding of what remains to be done.
Certificate of Occupancy issuance by the building department is the formal confirmation that the structure has been constructed in accordance with approved plans and that it’s legally habitable. This document is typically required by lenders for any construction-to-permanent financing and represents the official completion of the regulatory process.
Step 8: Moving In and the First Year
The first year of living in a newly built home is part of the construction process in a functional sense. New construction settles as the structure adjusts to its loads and the lumber dries to equilibrium moisture content. Minor cracks in drywall and trim joints are normal in the first year and should be documented and addressed under the builder’s warranty. Paint touch-up, seasonal adjustment of doors that have shifted slightly, and minor caulking of any gaps that develop are normal first-year maintenance items.
Most custom home builders provide a one-year warranty on workmanship and materials, with structural systems warranted for longer periods under state laws in many jurisdictions. Documenting any warranty items as they appear and communicating them to the builder in writing preserves your warranty rights and creates a record of the builder’s response.
Building your dream home is a journey that tests patience, decision-making, and financial discipline. But the destination — a home built specifically for you, expressing your vision, fitting your land, and serving your life with a precision that no existing home can match — is one of the most genuinely personal achievements available to a homeowner. The planning, care, and attention invested in the process are the foundation on which that achievement rests. A well-organized project management system, including a home building planner and organizer, helps you track the hundreds of decisions, contracts, and milestones that determine whether your building journey goes smoothly or struggles.
Begin with clarity, proceed with care, and the home you build will be worth every challenge the journey entails.